

Installation and Activation
This guide explains how to install and activate WC Affiliate and WC Affiliate Pro on your WooCommerce-powered WordPress website.
Server & Hosting Requirements
Before installing WC Affiliate, ensure your hosting environment meets the following requirements for optimal performance and compatibility.
Minimum Requirements
- WordPress: 5.2 or higher
- WooCommerce: 6.0 or higher
- PHP: 7.4 or higher
- HTTPS: Enabled (recommended)
If you are unsure whether your server meets these requirements, please contact your hosting provider.
Install WC Affiliate (Free Version)
WC Affiliate allows you to launch a complete affiliate program for your WooCommerce store within minutes. You can install the free version of WC Affiliate using either of the following methods.
Method 1: Install from the WordPress Dashboard
This is the quickest and easiest way to install WC Affiliate. It's free, and you will find the plugin from the WordPress Plugin Directory.
Step 1: Search for the Plugin
1. Go to WordPress Dashboard → Plugins → Add Plugin.
2. Type WC Affiliate in the search bar at the top-right corner.
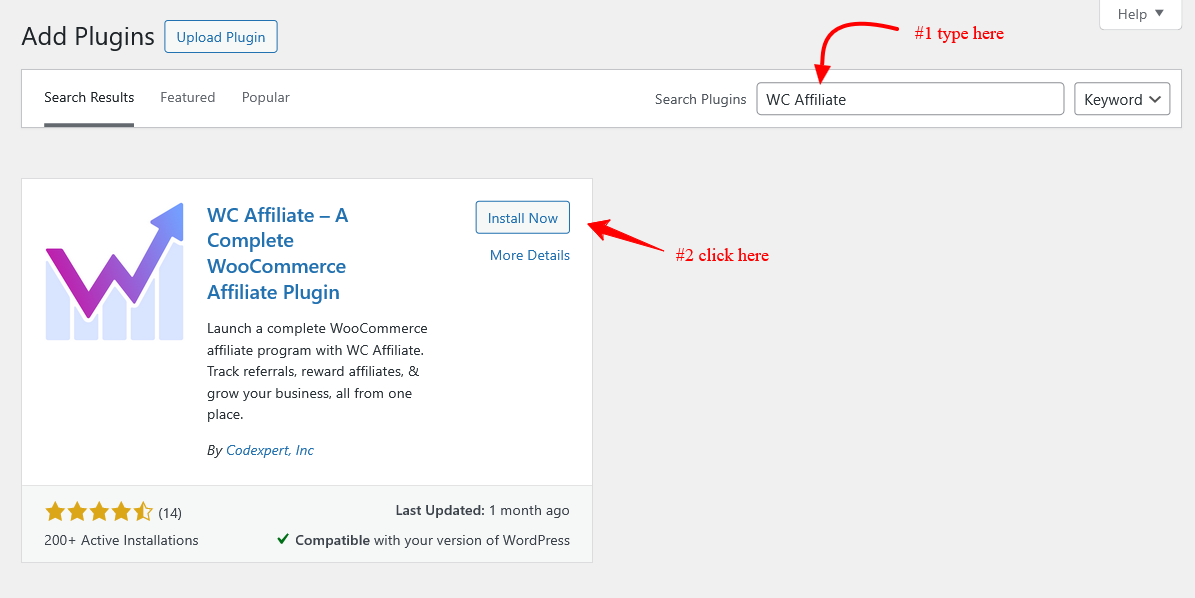
Step 2: Install and Activate
1. Click Install Now next to the WC Affiliate plugin. Once installed, click Activate.
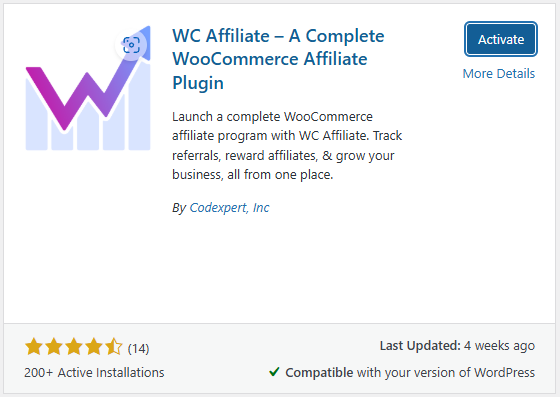
The WC Affiliate free plugin is now ready to use.
Method 2: Install from WordPress.org
There is another way you can install the WC Affiliate free version. Follow the process below for a clear overview
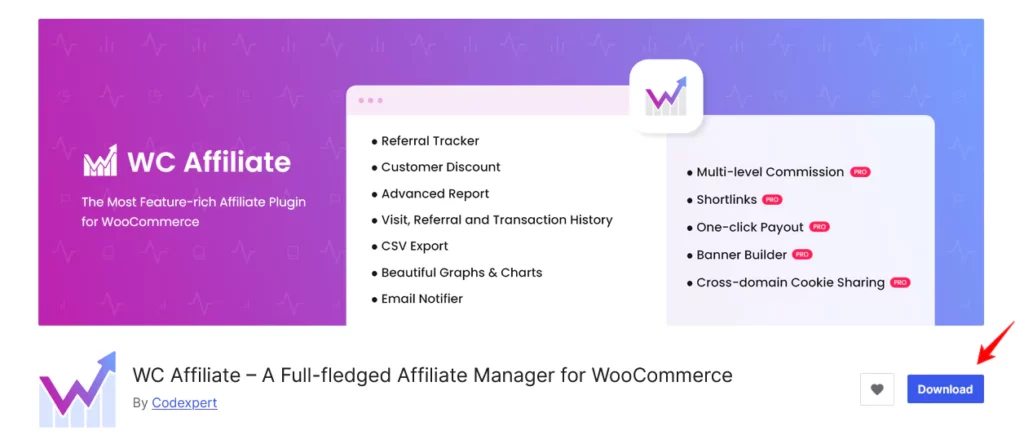
Step 1: Download the Plugin
1. Visit https://wordpress.org/plugins/wc-affiliate
2. Click Download to download the plugin file.
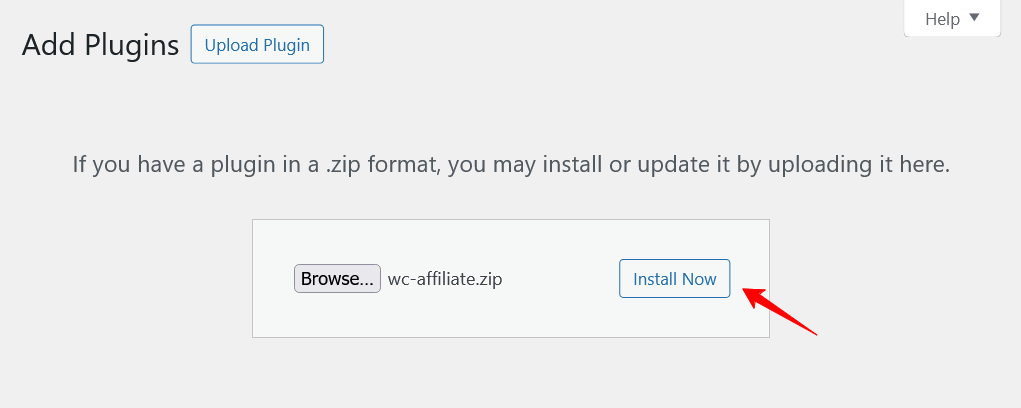
Step 2: Upload the Plugin
- Log in to your WordPress Dashboard.
- Navigate to Plugins → Add New.
- Click Upload Plugin.
- Click Choose File, select the downloaded WC Affiliate file, and click Install Now.
Step 3: Activate the Plugin
- After installation is complete, click Activate Plugin.
- WC Affiliate is now enabled on your website.

Install WC Affiliate Pro
WC Affiliate Pro provides advanced affiliate management features.
⚠️ Make sure the free WC Affiliate plugin is installed and activated before proceeding.
Step 1: Purchase WC Affiliate Pro
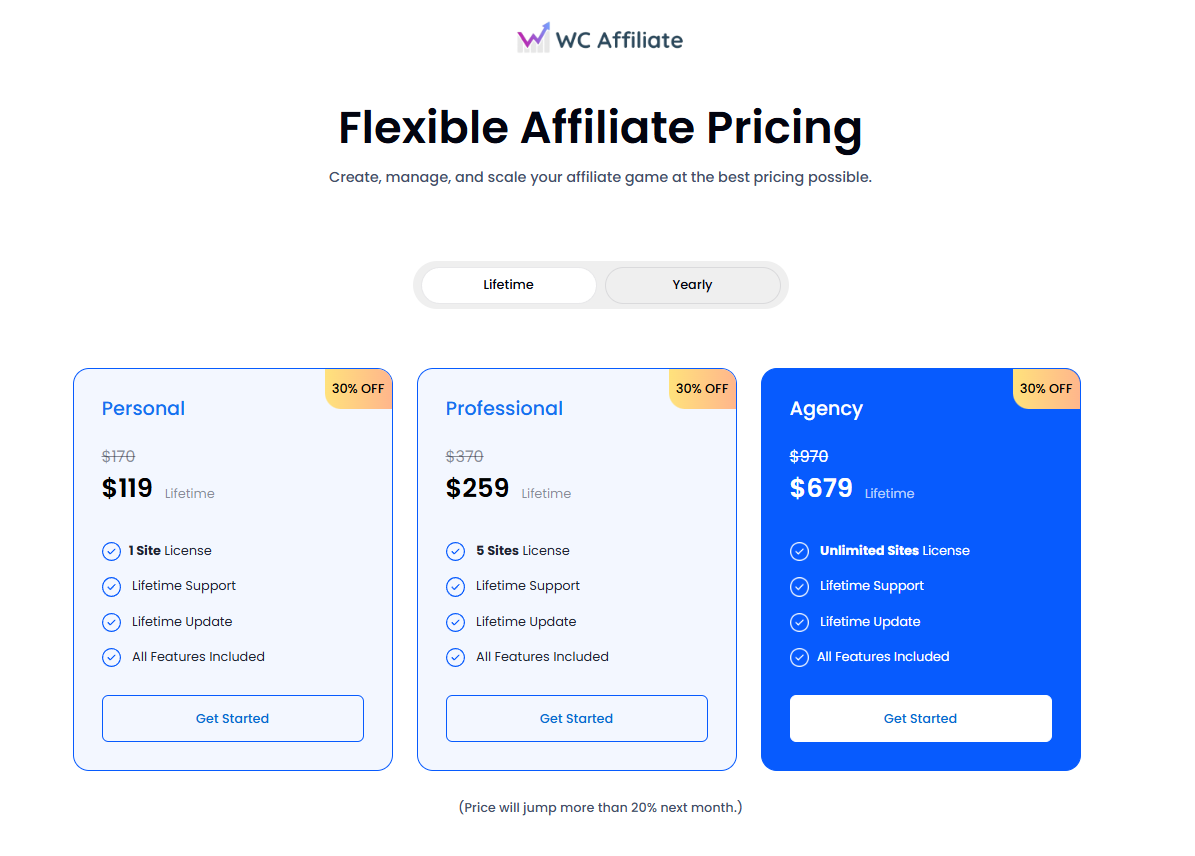
- Visit the WC Affiliate Pricing page.
- Choose your preferred plan and complete the purchase.
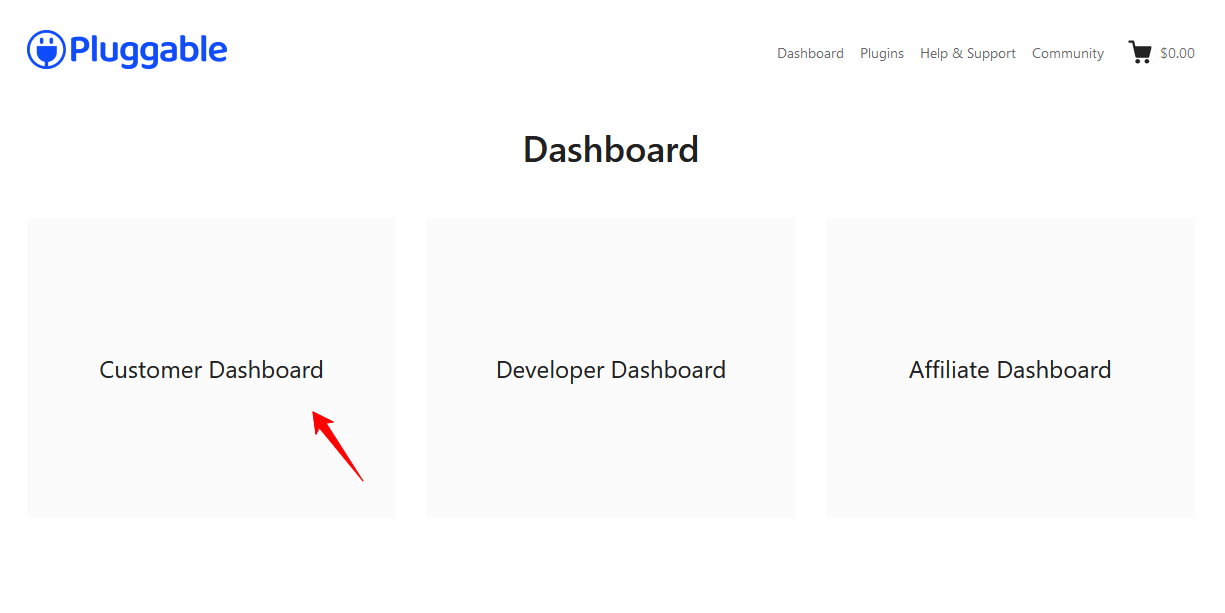
Step 2: Access the Pluggable Dashboard
- Go to https://my.pluggable.io.
- Log in to your Pluggable account.
- Open the Customer Dashboard to view your licenses and downloads.
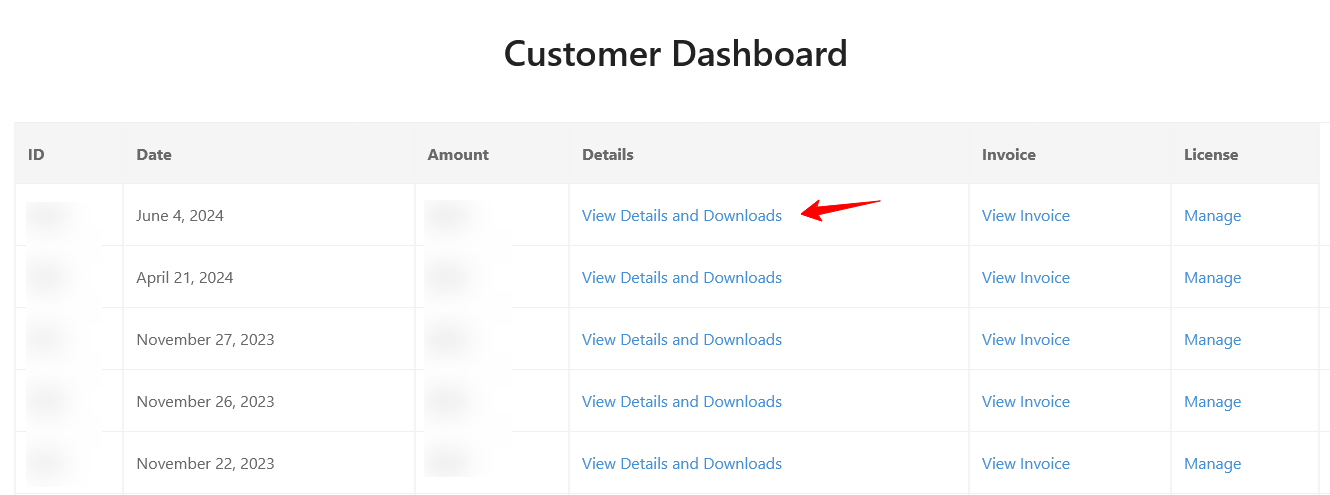
Step 3: Download WC Affiliate Pro
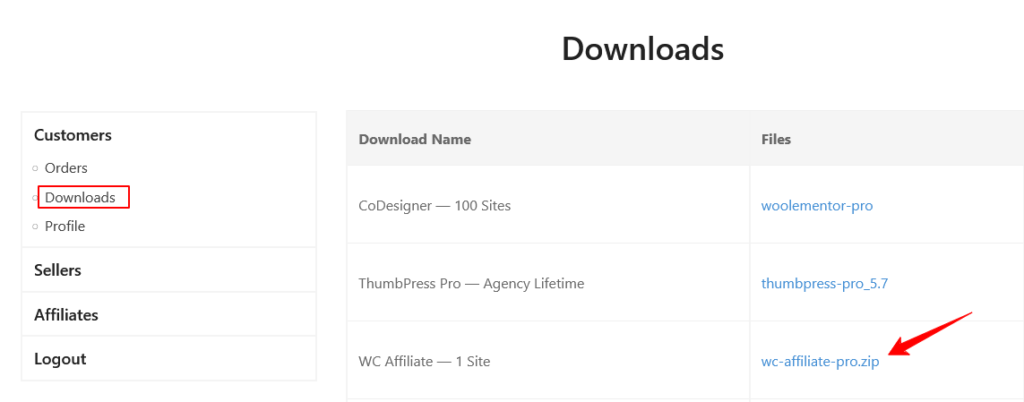
You can download the plugin in either of the following ways:
- Click View Details & Downloads and download the plugin from the bottom of the page OR
- Navigate to Customers → Downloads → WC Affiliate Pro
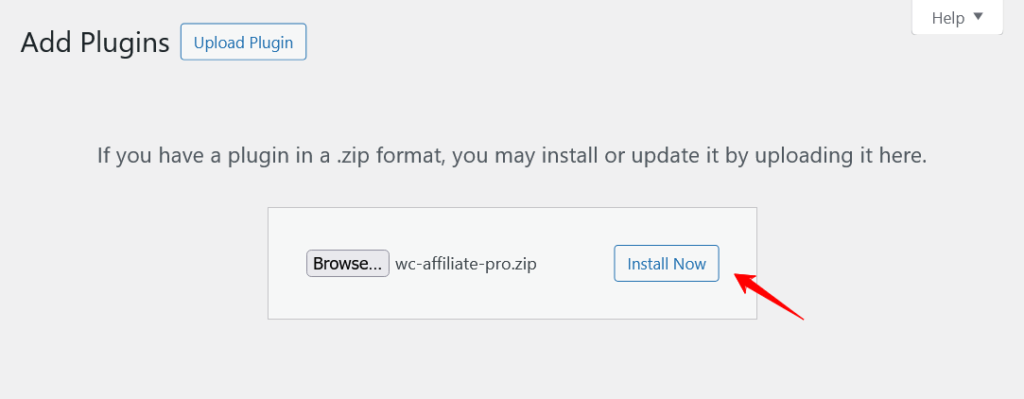
Step 4: Upload and Activate the Plugin
- Go to WordPress Dashboard → Plugins → Add New.
- Click Upload Plugin.
- Select the WC Affiliate Pro
.zipfile and click Install Now. - After installation, click Activate Plugin.
Activating the WC Affiliate Pro License
Activating the license is required to receive automatic updates, premium features, and support.
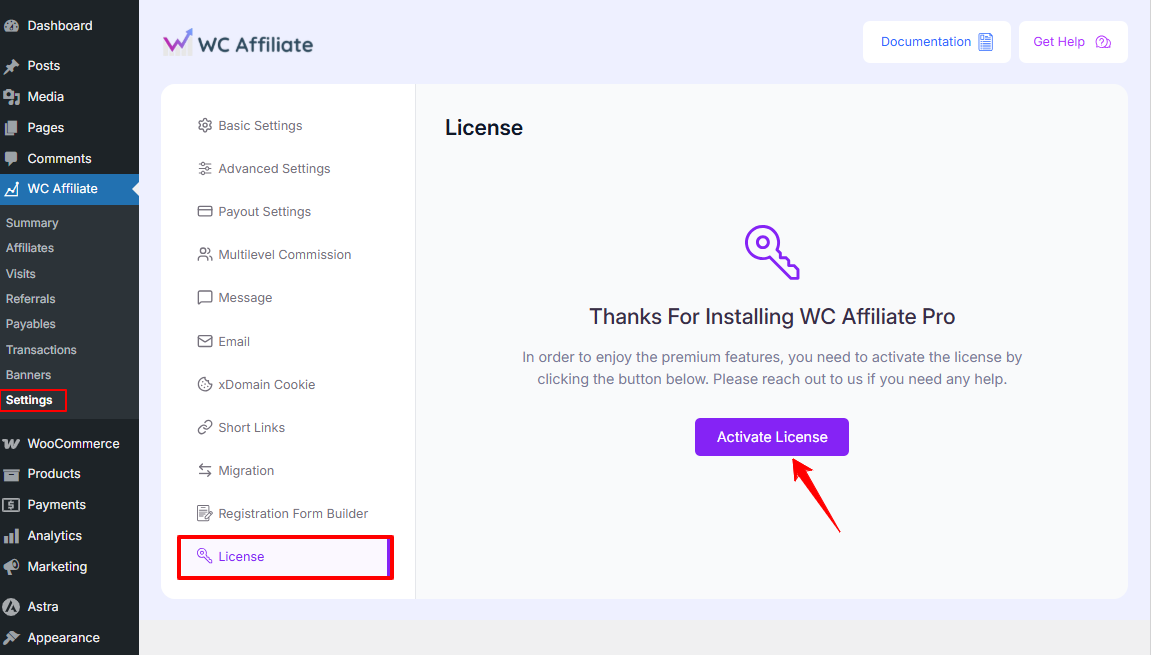
Step 1: Start License Activation
- After activating WC Affiliate Pro, please go to WordPress Dashboard → WC Affiliate → Settings → License
Here you will get an Activate button. - Click Activate it now.
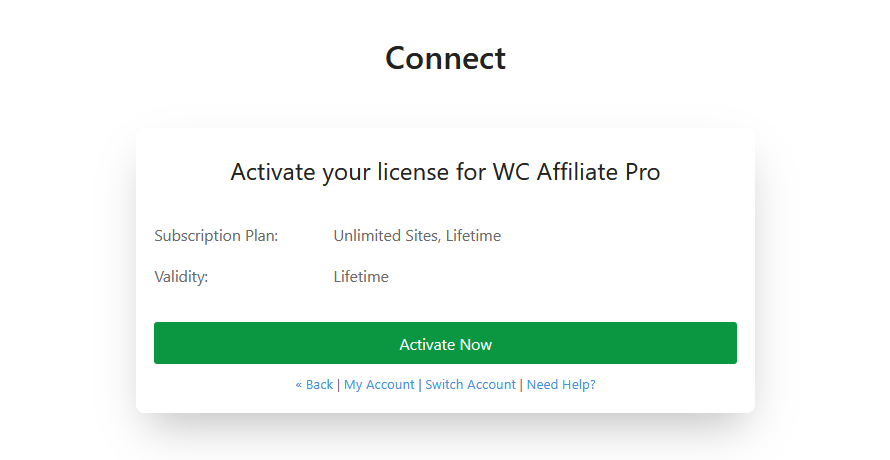
Step 2: Connect the License
1. After you click the Activate button, a pop-up window will appear displaying your license credentials, or you will have to enter your credentials.
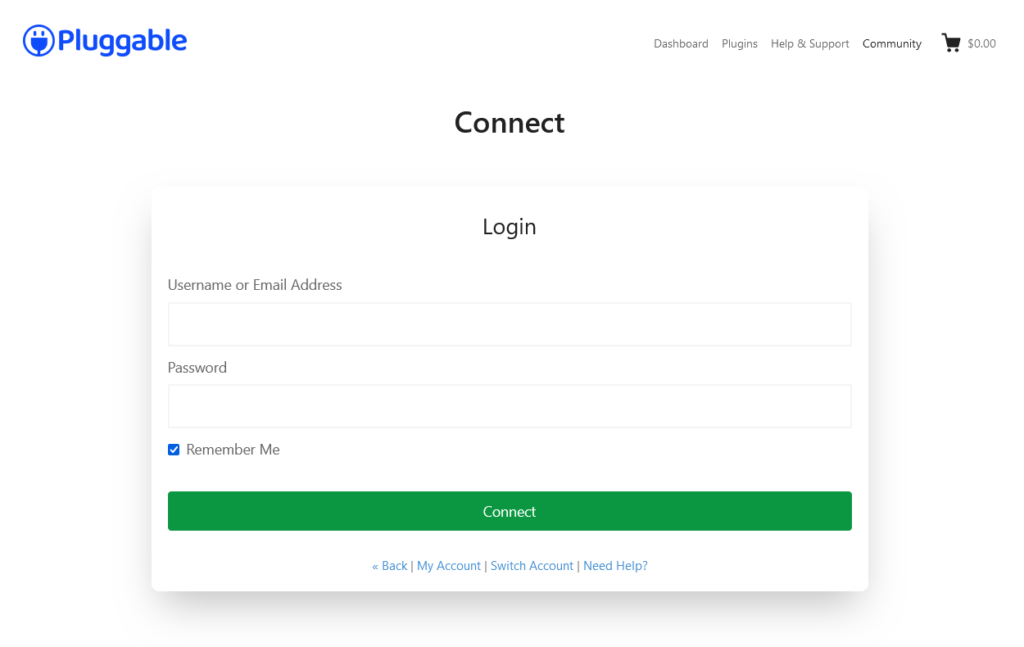
2. Click the green Connect button. Select the appropriate license from your Pluggable dashboard.
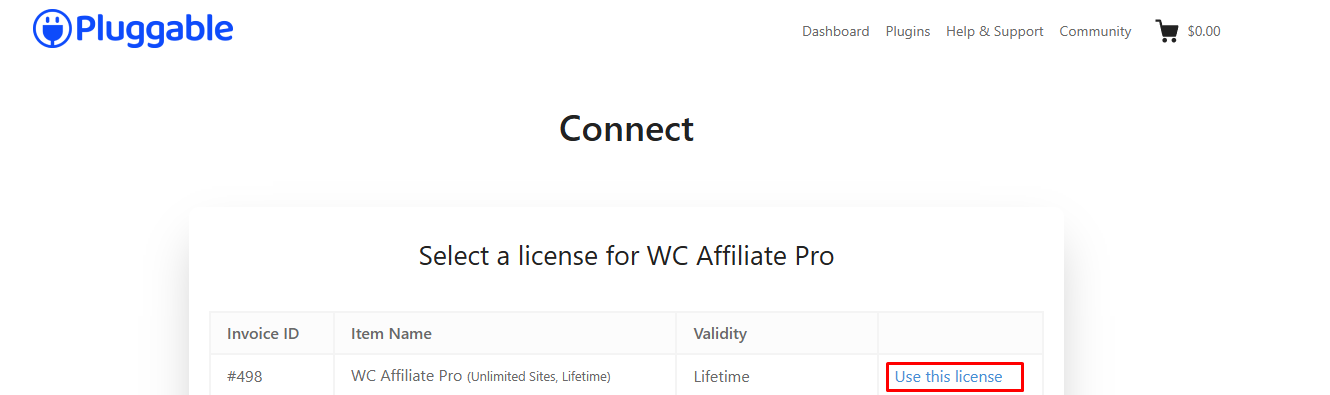
3. You will see an Activate Now button. Click it to activate your license.
Your WC Affiliate Pro license is now active. Enjoy every feature of WC Affiliate. If you face any difficulties, you can reach out to our support or join our community and ask for help.
Was this doc helpful?