

Feature Overview
The affiliation registration form builder is a unique solution for customizing the affiliate signup form to your liking.
With the WC Affiliate Registration Form Builder (available in the Pro version of WC Affiliate), you can add various new field types, remove existing ones, and even rearrange their order, all with an easy drag-and-drop interface.
Feature Functionality
Follow these simple steps to create and customize your affiliate registration form:
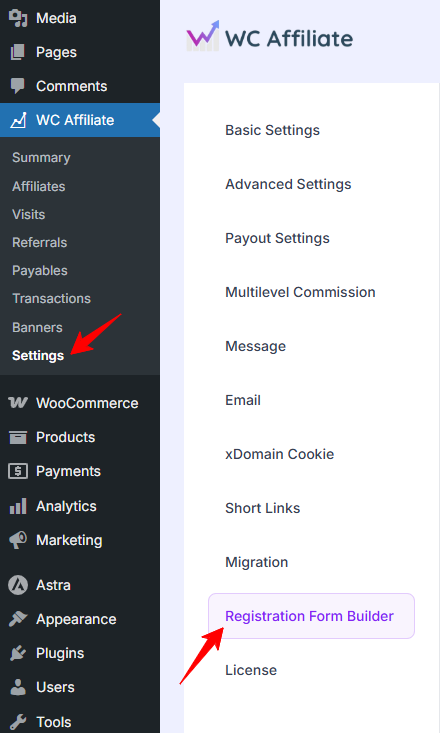
1. Access the Form Builder: Log in to your WordPress dashboard and go to WC Affiliate –> Settings –> Registration FormBuilder.
(Please note that this feature is only available in WC Affiliate Pro with an active license.)
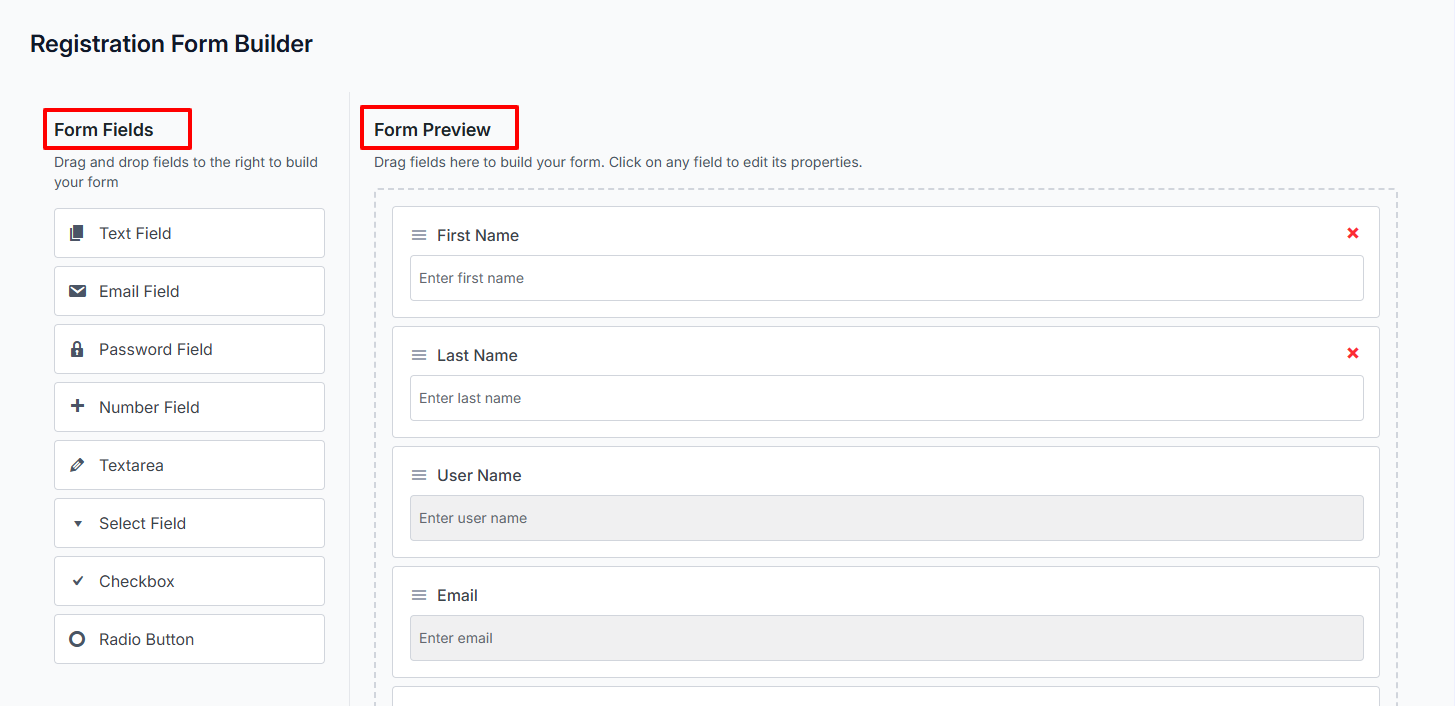
2. Customize the field: The registration form builder option is formed mainly using two sections:
Form Fields – contains the available fields you can add to your form.
Form Preview – displays the current fields in your registration form.
Form Fields
These are the field types available for placement within the registration form.
- Text – Single-line input for short free text (e.g., name, username, website).
- Email – Single-line field for email addresses with format validation (e.g., [email protected]).
- Password – Masked single-line input for setting a secure login password.
- Number – Single-line field restricted to numeric values only (e.g., age, follower count).
- Text Area – Multi-line box for longer free-form text (e.g., “About yourself” or promotion plan).
- Select – Dropdown menu to pick one option from a list (e.g., country, payment method).
- Checkbox – Box(es) for yes/no or multiple selections (e.g., agree to terms, select channels).
- Radio Button – Circular buttons for choosing exactly one option from a group (e.g., yes/no, gender).
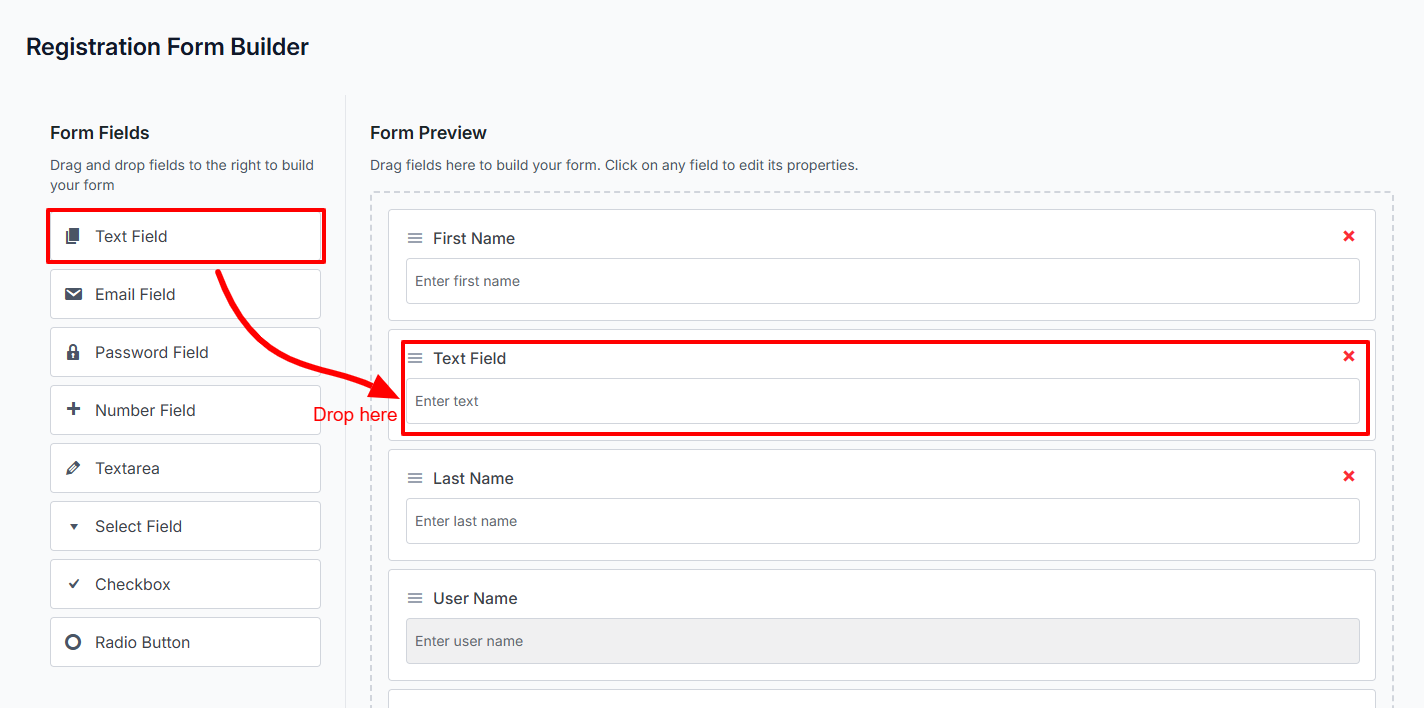
To add a new field into the main form, simply tap and hold on any field type and drag in onto the right side of the screen into the Form Preview section.
Form Preview
This is the main customization area of the affiliate registration form. It comprises several predefined fields such as –
- First Name & Last Name: The affiliate’s full name (first and last) for identification and personalization.
- Username: A unique username for the affiliate’s profile display and login credentials.
- Email Address: The affiliate’s primary email address (used for registration, notifications, approvals, and communication).
- How will you promote us?: A description from the applicant outlining their planned promotion methods, channels, or strategy (helps with approval decisions).
- Password & Confirm Password: The secure password the affiliate will use to log in to their account after approval (must match in both fields for security).
What do you do here? Well, you can-
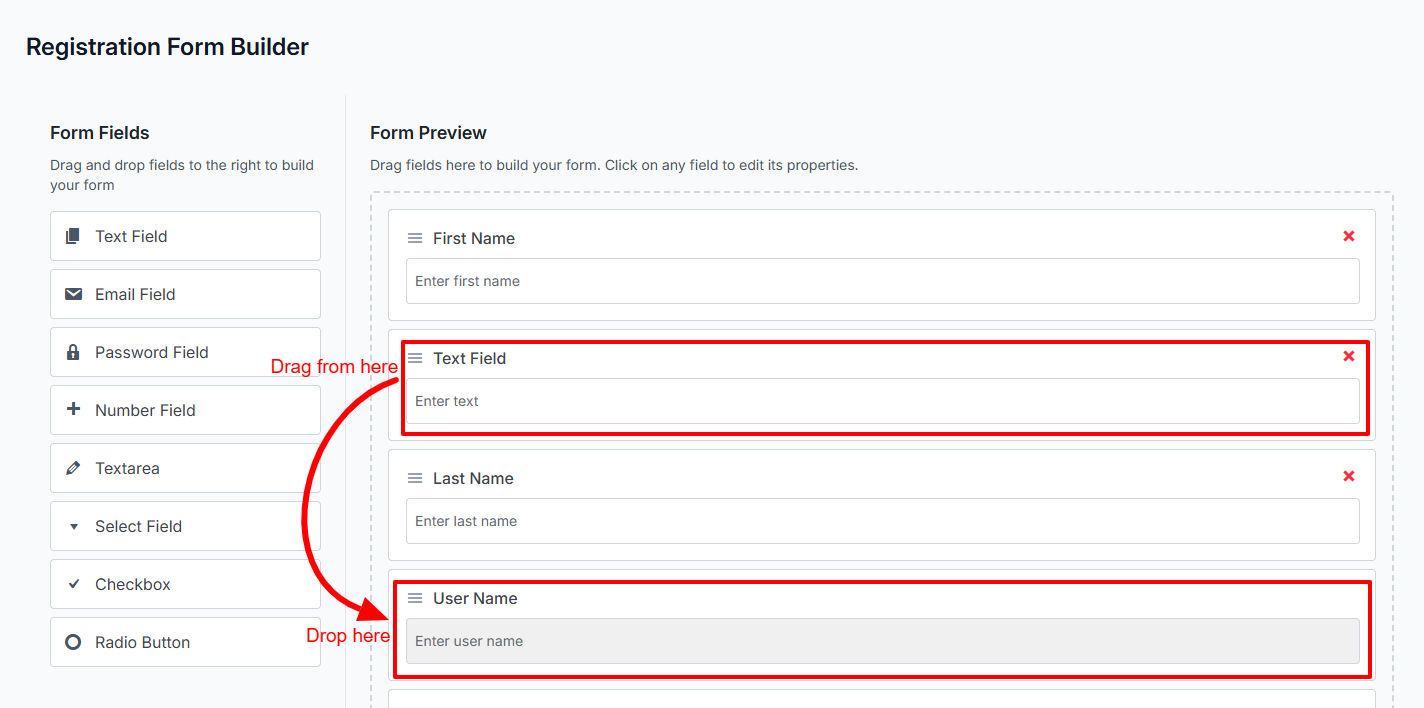
- Rearrange fields by simply dragging and dropping them into your preferred order.
- Edit any form field by clicking on it or its edit icon.
- Delete a custom field by clicking the cross (×) icon (default fields cannot be deleted).
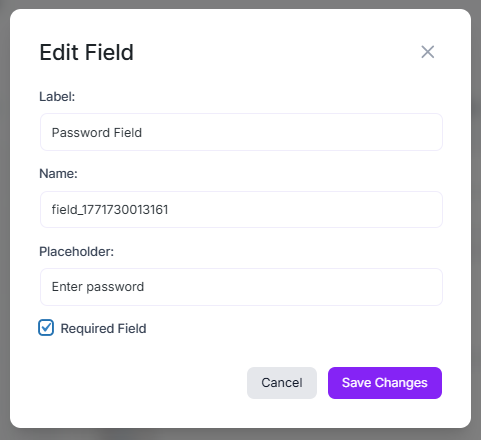
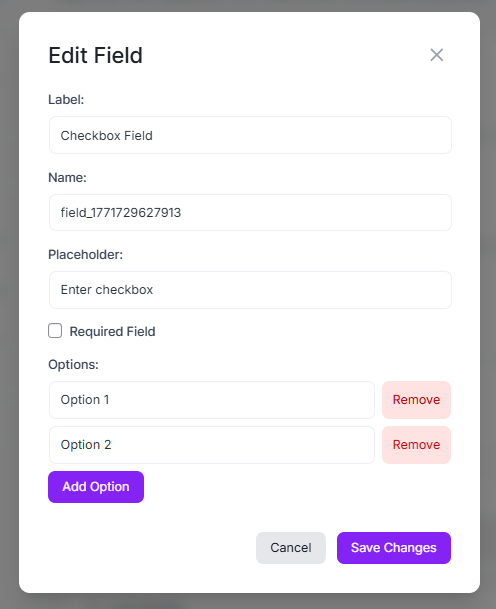
Edit a Field
To edit a field (other than default ones) within the form, click on that field, and a pop-up will appear with editing options.
Change the Label, Name, and Placeholder.
Mark the field as Required (optional).
(Default fields can’t be marked as required)
Click Save Changes once done.
For fields that involve selectable options (e.g., Select, Checkbox, Radio Button), the editing interface is slightly different to allow easy management of the choices/values.
Congratulations! Your new affiliate registration form is now ready to use!
Was this doc helpful?